How to stream/mirror your Vive Focus to an external display or computer
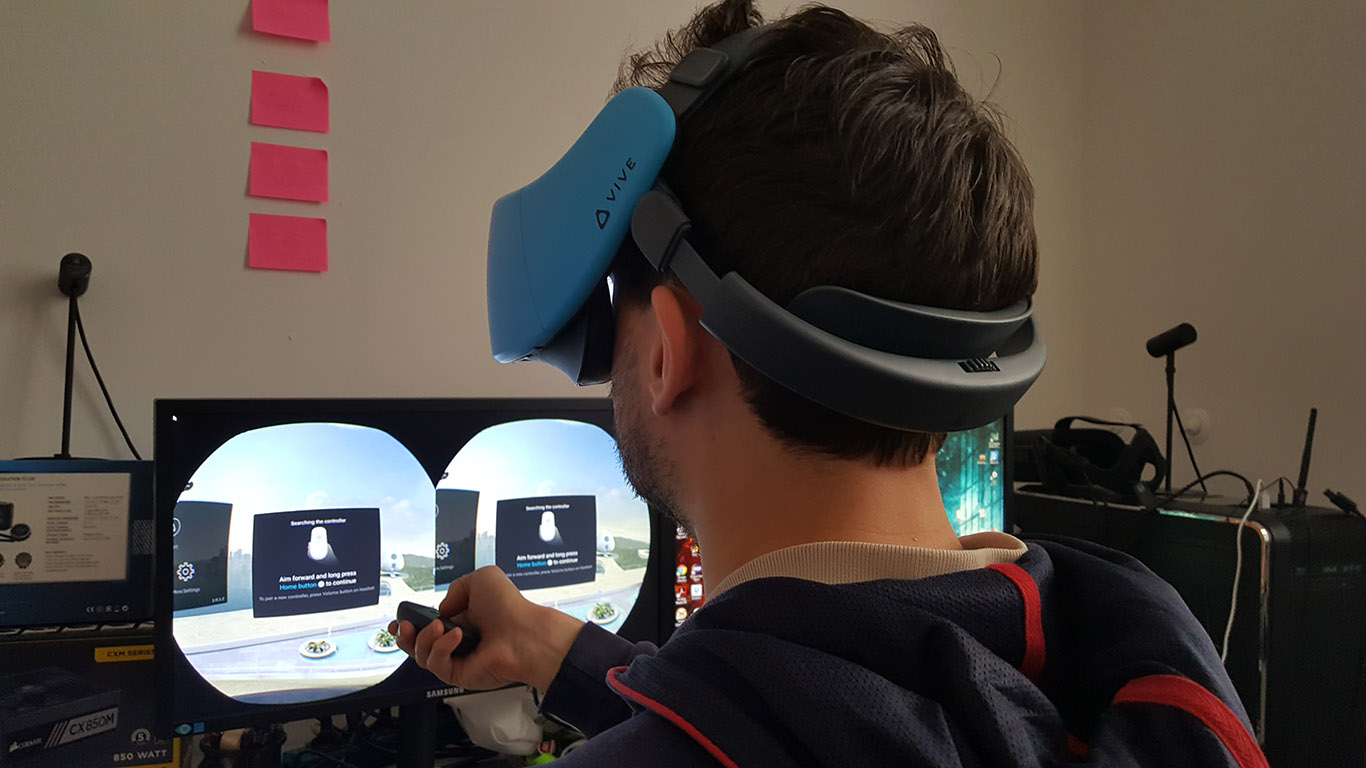
In these days I’m playing a bit with the Vive Focus that Mister President has lent me and one of the first things that I wanted to understand is: how can I stream its content to an external monitor? How can I record a video showing what I’m seeing inside? These things could be useful for me to have some media to show on my blog. Thanks to my perseverance and to the pieces of advice of Mister President, I have found 3 methods to mirror externally the content seen inside this new interesting device.
And since my new friends Andrea and Enea that are working with the Focus needed a tutorial on how to mirror the content, I said to myself: “Why not writing a complete blog post so to help even more people having the same problem?” and so… here you are! 3 amazing methods to mirror externally your Vive Focus content!
I've found a way to shoot videos inside the @htcvive Focus! Don't you think that its @Viveport environment is so cool and relaxing?#VirtualReality #VR #ViveFocus #HTCVive pic.twitter.com/5FPTlfosXo
— TonyVT SkarredGhost (@SkarredGhost) March 14, 2018
Adb
Pros: completely free and very powerful
Cons: it’s damn complicated; and has limitations in video recording time and in streaming quality
If you work with Android devices, you may surely know the name “adb”: it is the magical Android Debug Bridge, that is a powerful command-line tool that lets you connect your Android device to your PC. Yes, you’ve read it right: it is from the command line, so it feels so 90s and also so nerdy. I discourage you to use this method if you are not nerd enough.

Before starting with adb, you have to activate the developer mode and the USB debugging on the Vive Focus. You can do that going into Menu -> Settings -> More Settings and then digging a bit into the various developer settings of the Focus (they are very similar to the settings on an Android device, so I guess you will find it easy to do that). Furthermore, be sure to have installed all the Android dev Tools (for instance by installing Android Studio) and to have put the directory of the Android Tools (<android-sdk-path>\platform-tools\) inside your PATH environment variable. If reading these 3 lines your brain has exploded, it is better that you use one of the two other methods, otherwise keep reading and let the nerd power be with you.
Connect your Vive Focus to your PC through the USB cable to start. Then, open the command line by pressing Win+R and typing CMD.
Once you are here, verify that your device is correctly connected by typing:
adb devices
If the result is a device ID, then your Focus is correctly detected and we can go on. If you have more device IDs, then disconnect the other android devices, because otherwise triggering adb is a bit more complicated (it is possible, though). If you have no device ID or a device ID and the word “unauthorized”, you may have to authorize development tools and USB debugging on your Focus. Once everything is ok, we can go on.
To record a video, we have to use the command adb shell screenrecord, that is useful to record the screen of the device and to make a video out of it. The syntax of the command, for what interests us is
adb shell screenrecord --size WIDTHxHEIGHT --bit-rate BITRATE <OUTPUT_FILE>
the name of the parameters are self-explanatory. You can also avoid specifying the size and bitrate options, but this way the default ones are used and the default bitrate is quite low (4MBs for a video of 2880×1600 resolution). Note that this command will record the device screen for 3 minutes: if you want to record for less time, press CTRL+C when you want to stop recording. If you want to record for more time… well, you can’t. Usually, people solve this issue by triggering a DOS batch file that records various videos one after the other and then they merge the various videos using a video editing software. If you want some hints on this process, you may start from this forum thread.
Note that ADB also DOESN’T RECORD AUDIO: if you want to record the audio of the experience, you have to buy a cable with two 3.5mm jacks and connect the output of the headphones of the Vive Focus to the input microphone of your PC, record the audio using a software like Audacity and then mix the audio and the video using a video editing software like Adobe Premiere. I know, it’s a mess, but it’s the only way at the moment.
After the “adb screenrecord” command has done its job, the output file should be on your device, so you have to move it to the hard drive of your PC… but, how to do it? Well, you can use another command, that is
adb pull <FILE_ON_DEVICE> <PATH_ON_PC>
Where PATH_ON_PC may be just the destination directory or the full path of the destination filename. After all this, you have your wonderful video on your PC… cool, isn’t it?
To clean up the temporary video you just created, you can remove it from the device with another cool command line command:
adb rm <FILE_ON_DEVICE>
Ok, now let me write you a sample of the instructions that I usually use and that in my opinion creates videos that are of good quality and are not too big:
adb shell screenrecord --size 1920x1080 --bit-rate 12000000 /sdcard/video.mp4
adb pull /sdcard/video.mp4 c:\Users\anton\Videos\ViveFocusVideo.mp4
adb shell rm /sdcard/video.mp4

Feel free to modify these lines to change the parameters as you wish, but you should have gotten an idea on how to get started. If the resulting video is too glitchy, try to substitute “shell screenrecord” with “exec-out screenrecord” (thanks, Stack Overflow).
adb exec-out screenrecord --size 1920x1080 --bit-rate 12000000 /sdcard/video.mp4
adb pull /sdcard/video.mp4 c:\Users\anton\Videos\ViveFocusVideo.mp4
adb shell rm /sdcard/video.mp4
If you want to take a screenshot instead of recording a video, you have to use the screencap command, and then pull in the classical way. Here you are an example:
adb shell screencap /sdcard/screen.png
adb pull /sdcard/screen.png c:\Users\anton\Pictures\ViveFocusPicture.png
adb shell rm /sdcard/screen.png

Now, you may tell me that you don’t want to record a video that can be used after, but that you want to perform a live streaming of the performance of your user… is it possible? Well, with a little of creativity, that is possible too.
First of all install VLC Media Player. Then type this exact command, that sends the output of the screenrecord command directly to the input of VLC media player that so shows it on the screen of your PC:
adb exec-out screenrecord --bit-rate=16m --output-format=h264 - | <PATH_TO_VLC> --demux h264 --h264-fps=70 --clock-jitter=0 -
For instance, on my PC, I execute this one
adb exec-out screenrecord --bit-rate=16m --output-format=h264 - | "C:\Program Files (x86)\VideoLAN\VLC\vlc.exe" --demux h264 --h264-fps=70 --clock-jitter=0 -
I have to warn you that the resulting streaming lags a bit and sometimes has some hiccups… but it works. If you are someone that cares about details, you have surely noticed that I specified a FPS of 70 and not 75, that is actually the framerate of the Focus: this is because VLC is very sensitive to errors in timestamps and using 70 reduces this kind of errors and so VLC behaves better with the stream (this has suggested me by someone that has actually worked at VLC, so it is some kind of streaming magic). Using the straming, you can help someone wearing the device, guiding him in what he has to do just by looking at the screen of your PC.
I’ve noticed that instead of using VLC, you can have slightly better result using Mplayer. Mplayer is a command line video player (this will cause in you a nerdiness overload), completely opensource. You can download it from this page (if you have Windows, you can download it from here). After you have downloaded it, you can stream the Focus with this command:
adb exec-out screenrecord --bit-rate=16m --output-format=h264 - | <PATH_TO_MPLAYER> -demuxer h264es -fps 75 -fs -
Before ending this nerdiness, I have to answer the last question that goes around in your head: how to make all of this to work without the USB cable? One of the strong points of the Vive Focus is that it offers wireless 6 DOF, it would be a pity to use it with a USB cable attached to your head. Well, in this case, everything I told you before still holds, but before executing all those commands, you have to know the IP address of the Focus and instruct adb to work over TCP/IP and not over USB.
You can find the IP address of the Vive Focus by looking for it in the info section of the device (as for Android: Settings -> More Settings -> Device Info -> Status) or by just launching this super nerd command
adb shell ip addr show wlan0

Take notice of the IP address. Then, with the device still connected over USB, type this command to make ADB connect over TCP/IP
adb tcpip 5555
5555 can actually be any port number, but it is like a tradition to always use the 5555 port with this command… so don’t mess with gods of adb and use this number! Disconnect the Focus from the USB and then write:
adb connect <VIVE_FOCUS_IP>:5555
After that, you can run the screenrecord command and record or stream a video wirelessly! In this case, my advice is that you lower the framerate of the streaming: I usually use 2mpixel. So the line that I use is this one:
adb exec-out screenrecord --bit-rate=2m --output-format=h264 - | <PATH_TO_MPLAYER> -demuxer h264es -fps 75 -
It’s not over! There’s still one last trick that I got from Stack Overflow: do you remember the 3 minutes limit? We don’t want the streaming to stop after three minutes… so we can instruct adb to start a new streaming after the first one finishes using a command line loop. So, here you are the final perfect command line statement for USB streaming (for Wi-fi just diminish the bit-rate):
adb exec-out "while true; do screenrecord --bit-rate=16m --output-format=h264 --time-limit 180 -; done" | <PATH_TO_MPLAYER> -demuxer h264es -fps 75 -fs -
I love using adb because it makes me really feel a super techie. Look at this cool video I made in the office moving into the room!
Vysor
Pros: very easy to set up, streams on a PC and lets you create videos
Cons: unless you buy the Pro version, you have very limited functionalities
Vysor is a program that lets you see the content of your Android device screen. Basically, it does exactly the same things of the above ADB method, but it is user-friendly and doesn’t require you to mess with command line instructions.

To use Vysor, you have just to go to its official page and download the installer for windows. After that, you install it and then you launch it, with your Vive Focus connected via USB to the PC. Vysor will detect it immediately. At this point, when you start the streaming for the first time, Vysor will install its APK on the Focus automatically… and then it will let you magically see the content of your device on your screen… wow! Very easy to be used and very powerful.

With this method is not only possible to let other people see what you’re seeing, but you can also record a video! Recording a video of what you are doing on your Focus is possible if you use a program like OBS and record the content of the Vysor window or directly of your screen. Using OBS it is also possible to stream what you’re doing to Twitch or Youtube… the possibilities are endless.
The drawback is that the free version of Vyzor offers you only a really poor-quality streaming and only via USB. If you want to use Wi-fi streaming, you have to buy the Pro version and the same holds if you want to record videos automatically or you want to enhance the quality. Demoing a Vive Focus with a long USB cable has little sense, since the power of this device is exactly the one of being wireless… so if you want to use Vysor and exploit its user-friendliness my advice is to spend some money for the Pro. If you’re in business and you shoot frequent videos of VR headsets, the Pro is worth its price: it’s 2.5$/month or 10$/year, so it’s really cheap. If you are here on this page just because you want to make a single video or you have to go to a single exhibition, then you may consider another free solution.

Miracast
Pros: quite easy to set up, great quality
Cons: you have to buy a Miracast-compatible device; streams only to a screen so it is hard to make videos
Miracast, as Wikipedia says, is the standard of sending video information to a display over a network, it is like “HDMI over Wi-fi”. The most famous Miracast device is the Google Chromecast: it creates a Wi-fi hotspot and you can send the screen content of your phone to an external HDMI screen very very easily.

Vive Focus supports Miracast out of the box and this is a great news. The less great news is that the only tutorial that I’ve found to exploit it is in Chinese :O… and reading it I had the classical 我他妈什么都看不懂 (I don’t understand a single f**k) reaction… but luckily there were pictures, so I understood the process and I can tell you how to do that.
First of all, connect your Miracast device to an HDMI screen and initialize it. Then let’s make the Focus stream data to it… this will require some steps.

You have to go in the Settings of your Vive Focus (Menu button -> Settings) and then choose More settings. Inside the window that will pop up, you will have to consider the Network settings. Below the name of the Wi-fi you are connected to, there should be a “More” button. Click it. You should now select “Cast” and then arrive at a stage where you see a list of wireless displays: we have to find the one of our Miracast device. But the Vive runtime won’t show you Miracast wi-fis unless you activate a particular flag: so, go in the upper right corner of the settings window and click the 3-points-icon and activate the flag for showing streaming devices wi-fis. At this point, you should see the Wi-fi of your Miracast device: click on it and let the streaming begin! When you want to turn it off, you have just to come back to this menu and click again on the Wi-fi name to disable the streaming. It is quite simple, but explaining it with only text seems so complicated! So, here you are a video that explains that better…
This solution has the advantage that it is easy to be configured and has a good quality. The disadvantage is that since you are streaming to an external video and not a PC, you can’t shoot videos or photos of what you are doing inside the Focus. So, this is good to let other people inside your same room see what you’re seeing in the VR headset: it is an ideal scenario for exhibitions, for instance, where you have just to check what the other person is doing and you have not to record anything.

UPDATE: Many months after this post, I have also published an elegant solution to mirror the Focus content to your PC (audio included!) using Miracast. You can find it at this link.
And that’s it for this guide… I hope to have helped my friends and all other people that may need to stream the inner content of the Vive Focus on an external monitor or PC! If this is the case, please share this article and subscribe to my newsletter to sustain my VR website!
Disclaimer: this blog contains advertisement and affiliate links to sustain itself. If you click on an affiliate link, I'll be very happy because I'll earn a small commission on your purchase. You can find my boring full disclosure here.
Great article!
Daydream View got a recent update enabling on screen recording and screenshot via “chords” using the remote (home and volume up for recording, home and volume down for screenshot). It’s alot easier for screenshot than reaching up and doing the same using power button and volume button on pixel phone whilst in headset.
Currently no audio on screen recording, but it adjust output to remove barrel distortion and display single lens view. Does cause my Pixel XL to lag slightly and overheat quickly probably snapdragon 821 struggling, whereas 835 in Pixel2 could take it in it’s stride.
Happy VR 👍
Maybe that combination of keypresses triggers ADB avoiding you to have the hassle of using the command line, that would explain the absense of audio too 🙂
Anyway, great to know… this demonstrate once more how Daydream is a very interesting project…
Daydream is a weird platform? Lack of headset sales = small community, limited number of applications (compared to Gear VR) but also some real gems – Virtual Virtual Reality and Eclipse: Edge of Light are true VR experience 😍
And lots of cool experimental stuff. Reminds me of Sega Dreamcast!
Last week on Daydream I am using Chrome Canary in VR with wired keyboard connected using USB-C adapter, good I can touch type 👍
And experimenting with Web VR. Then recording videos in headset. Marvelling at HD content in YouTube VR (Wes Anderson’s “Isle of Dogs” 360 wow!!), cursing at streaming issues in ViveVideo and watching my avatar glitch in broken Altspace. Its a wild ride on the forgotten platform…
You’re making me willing to buy a Daydream headset!!
If you have a Pixel phone (preferably Pixel XL or Pixel2 XL) it’s worth getting a 2017 View headset. I’ve heard mixed report about Daydream performance on “compatible” non-pixel phones. Pixel secret sauce is the stripped down OS (I’m currently on Oreo 8.1.0) making it the fastest Android phone available and this translates into fluid Daydream VR (currently 1.13). Constantly getting updates and lots of developer pre-release access from just opting in.
Its a cool platform because few people seem to have it or really experienced it properly, and I am liking it alot. Then there’s the AR Core side of the Pixel, another awesome technology to play with 👍
I don’t have a Pixel. I have played around with ARCore with an ASUS phone… it is a pretty interesting technology!
Therein lies the problem for Google…
Pixel (and Pixel2) has tiny marketshare compared to Samsung, Apple, etc. From talking to Daydream View users on “Compatible” handsets, many report a sub-optimal VR experience, perhaps from their phone being on older Android, not getting the constant updates(many complain of controller drift, but mine is rock solid), bloatware slowing OS, higher latency display?
Glad you enjoyed AR Core 👌
test