Vive Focus 6 DOF controllers devkit unboxing and setup instructions
In December, I published this tweet:
All I want for Christmas is:
– Mariah Carey
– 6 DOF Controllers for the Vive Focus
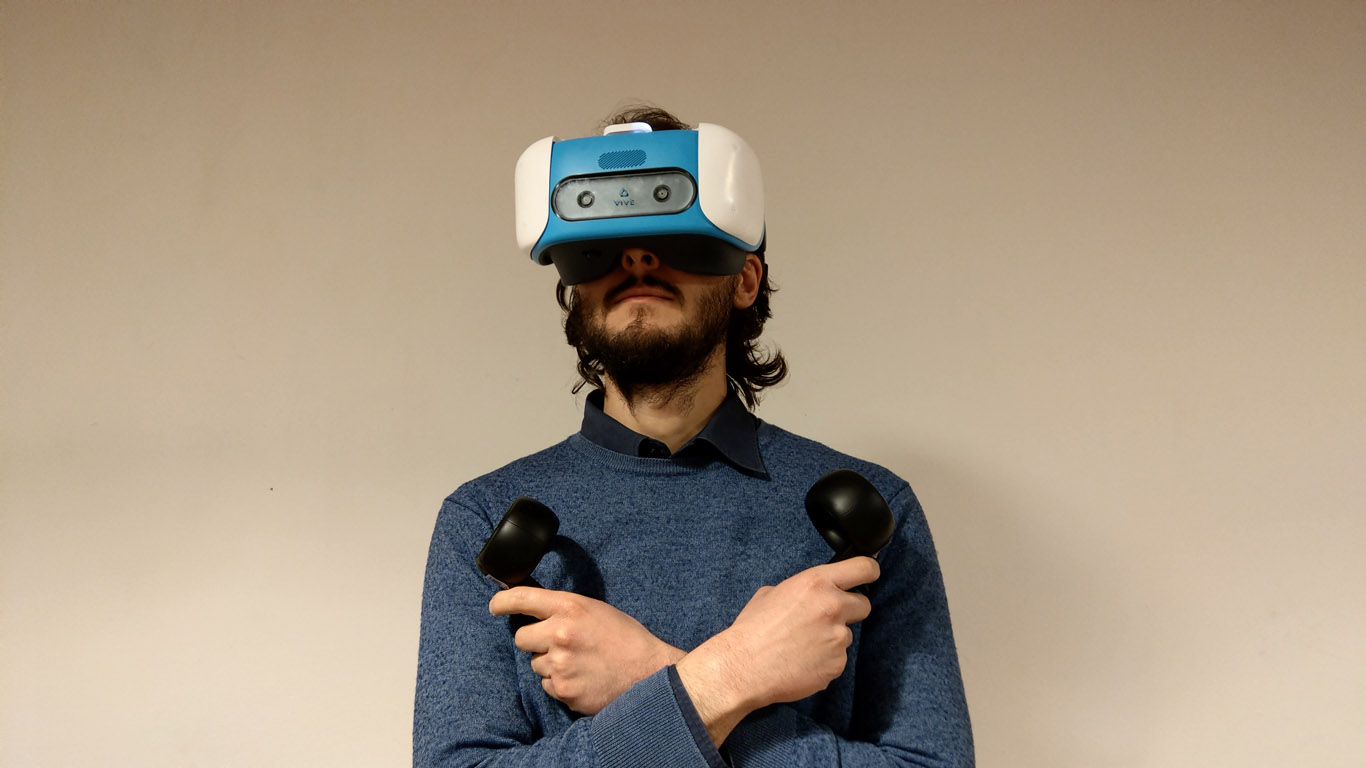
About the first point, unluckily nothing has happened. But regarding the second one… well, I must have been a good guy in 2018 because Santa Alvin (the Chinese version of Santa Claus), has actually fulfilled my dream. I have so obtained the 6 DOF Controllers dev-kit for the Vive Focus!

HTC is sending these devkits to selected developers to let them experiment with the devices, provide feedback and create 6 DOF applications. This is basically what happens with every devkit that every technology company sends around the world.
They arrived yesterday evening at my home, after a complicated journey going from China to Italy. In this journey, well, the original box has been removed during the transportation for logistics reasons. I wanted to show you an unboxing, but since there is not a box, I will provide you a “non-boxing” 😀 in which I show you the content of the box. Watch the video and enjoy the 6 DOF Kit 🙂
As you can see from the video, the kit is composed of three main pieces:
- A faceplate, to be installed on the headset;
- Two 6 DOF controllers.
The two components work together to provide the ultrasound tracking that lets you use both your hands inside virtual reality applications.
Actually in the box there is also a little plastic bag with inside the two screws to attach the faceplate to the Focus. I haven’t shown them in the video, because they are just a little detail, but they are inside the box as well 🙂

The two controllers are identical and feature:
- 1 (clickable) trackpad.
- 2 buttons;
- 1 status LED;
- 2 grips (on the back).
Every controller gets tracked with ultrasound technology and requires two AAA 1.5V batteries to work.
The faceplate has all ultrasound stuff on it as well, plus:
- The button to turn the device on/off, that when pressed, goes to press the underlying power button of the device;
- Two holes to fix the faceplate to the headset with two screws;
- A USB plug that has to be inserted into the USB C port of the headset;
- One additional USB port, so that the user can still have a USB C port through which charge the device, even if the one on the headset is occupied by the faceplate;
- One status LED that becomes white if the system is tracking the controllers. There is also a little hole through which it is possible to see the status LED of the Focus;

The faceplate is white because now HTC is selling on the West only the white version of the headset. But my headset is blue… so now I have a blue headset with a white faceplate and black controllers. I like my super-colored setup 🙂
The assembly of the kit is super super easy. I have made a video to explain that better to you:
Summarizing, what you have to do is:
- Update the Vive Focus to its latest version;
- Put the batteries in each controller and press a button on each one of them to make them awake. Please use batteries that are well charged, so that you are sure that they are going to work;
- Apply the faceplate onto the headset. You have just to insert the USB plug of the faceplate into the USB port on the headset. It is very easy to be installed, but be sure to push well the faceplate onto the USB so to secure its position. If you still feel it as unstable, fix it to the headset with two screws, opening the “secret lid” of the headset. If you’re wondering if you can add the faceplate when the headset is on or if you must install it when the headset is turned off…well, it is more or less the same. Anyway, starting the headset with the faceplate on, is something more coherent;
- If the faceplate has been inserted well, you should see its LED becoming lit. If you can’t see any lit LED, push the faceplate better onto the headset;
- Wear the headset and press for some seconds the two system buttons of the two controllers to pair them. They should vibrate for an instant to indicate that the pairing has gone well. A window on the screen should guide you in the pairing process. You can also pair only one controller by pressing the system button and then the rear trigger;
- At this point, most probably you will see in your home screen only one of the controllers. This is because the home screen shows only one controller at a time. To see both controllers, push the system button on the main controller and open the system menu. Now you should see both your controllers moving;
- Enjoy your 6 DOF controllers!

Notice that if you remove the 6 DOF faceplate, you can revert back to using the standard 3 DOF controller… this is absolutely not a problem for the operating system.
I will keep you updated regarding my works with these controllers. And I will also write for you a review in the upcoming times, also showing you some videos from inside the headset. For now, I can only say that I am incredibly excited about having a 6 DOF headset with 6 DOF controllers… almost 4 months before the Quest will be out!
6 + 6 = happiness 😉
Disclaimer: this blog contains advertisement and affiliate links to sustain itself. If you click on an affiliate link, I'll be very happy because I'll earn a small commission on your purchase. You can find my boring full disclosure here.


