How to remove unwanted Unity audio permissions to submit to App Lab
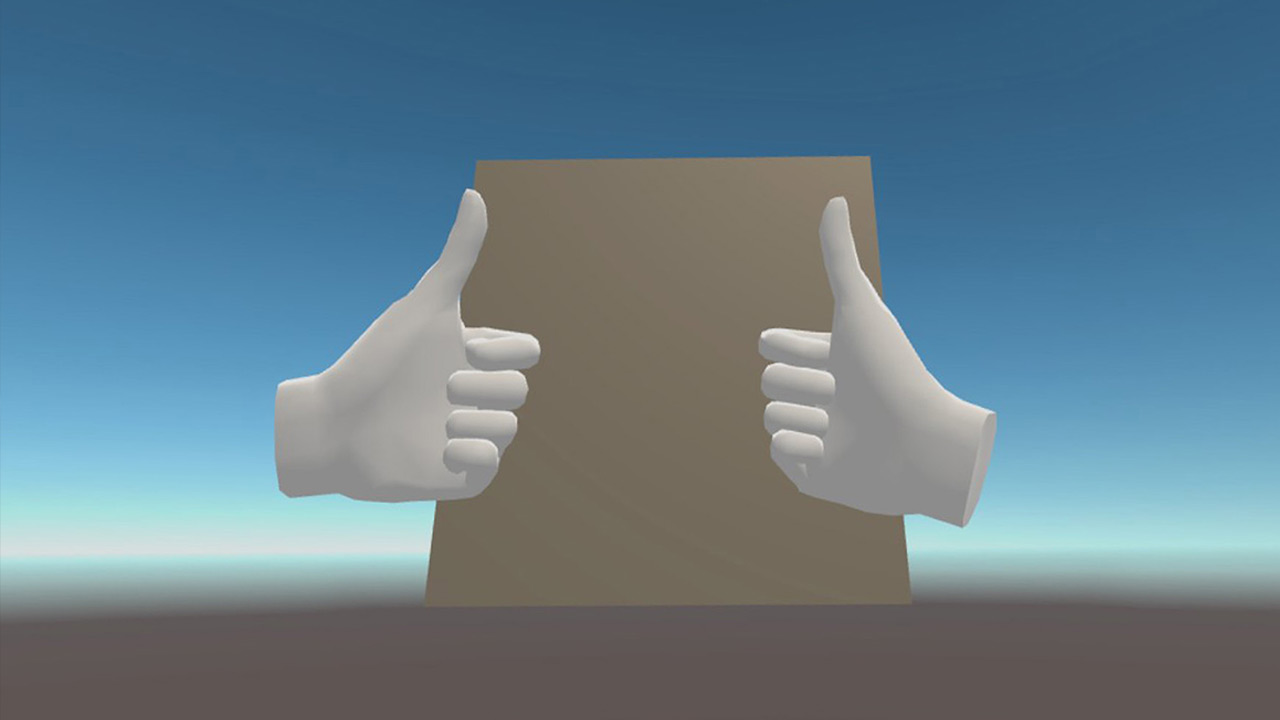
For sure you remember that together with my tutorial on how to develop and submit an application for App Lab, I have actually submitted to App Lab my majestic “The Unity Cube App”, an application with just a cube and some avatar hands (Yes, I’m a troll).
After 6 weeks of wait, the application has been rejected by Facebook for two reasons, and one of them was the un-needed audio permissions that Unity has automatically added to my application. I have discovered that this is a problem haunting also other developers, so let me explain to you why it has happened and how I have solved the problem.
As usual, here below, there is a very detailed video version of the tutorial if you don’t want to read the textual instructions!
First rejection reason: “Screenshots may not be repeated”
Before digging into the real topic of the day, let me tell you what has been the other reason why The Unity Cube has been rejected. The reviewer has complained that “Screenshots may not be repeated”. Well, it is just a Unity cube… what kind of explicative screenshots do you want?? Isn’t one with a cube just enough?
It seems that now, Facebook wants 5 different screenshots of a cube. So I spent 5 minutes of my life framing a Cube from different positions and angles and making shapes with my hands in front of it. Yes, I want 5 minutes of my life back. All because someone from Facebook has not any kind of sense of humor…

Second rejection reason: “The app asks inappropriate user permissions”
While the first problem was easily solvable with a photoshoot of a cube, the second one looked more serious and trickier to solve:
VRC.Quest.Security.2
The app must request the minimum number of permissions required to function.
Your app is asking for the following excessive or inappropriate user permissions: [Record Audio / Access the microphone] Please remove all unnecessary permissions. If your app requires any of the permissions listed above please explain in detail why your app needs the permission in order to function. Please be more specific with why users need to grant microphone permissions to this application. There is not an obvious way to access streaming functionality within the application. If your app requires microphone permissions, please explain in detail why your app needs the permission in order to function.
Long story short: I’m asking permission to use the Microphone, but my app doesn’t need to use a Microphone (it is just a damn cube!). Since the Microphone is something that could be used to violate the privacy of the user, it is suspicious that I’m asking for it, if I don’t need it. And since Facebook cares about the privacy of its users,
it is asking me to remove the permission if I don’t need it. This seems right on their side.
There is only a problem: I never requested that permission, I am sure about it… is it really there?
Is there an audio permission request in my app?
The first thing I did, was verifying that I was actually asking for that permission. So I opened the command line (yes, I’m a nerd, and in all the movies, nerds use only the command line, and I can’t disappoint my fans), and used the tool “aapt” to verify the permissions asked by my application. Aapt can be found in the “build-tools” subfolder of your Android SDK folder. On my PC, where I left the default location of the Android SDK chosen by Android Studio, it is in: “C:\Users\anton\AppData\Local\Android\Sdk\build-tools\30.0.2\aapt.exe”, in yours, you can look in “C:\Users\<your user name>\AppData\Local\Android\Sdk\build-tools\<android sdk version>\aapt.exe”.
Running the command
"C:\Users\anton\AppData\Local\Android\Sdk\build-tools\30.0.2\aapt.exe" d permissions TheUnityCube.apkI got as an answer that actually my application was asking the permission to use Bluetooth, Microphone, and Internet. Damn. The serious Facebook guy was correct.

I so looked inside my Unity Project, but in the Manifest.xml file in Assets\Plugins\Android I found no references to permissions or similar things. So, where is this request? And who has added it?
Unity and its automatically added permissions
A light bulb lit in my mind. I remembered that actually, even if you put your own custom AndroidManifest.xml file in Unity, it doesn’t become the final Manifest of the application. It gets merged with another Manifest created automatically by Unity, in which Unity puts what is necessary to make your app function correctly.
And among these features added by Unity, there is one that regards the permissions. If Unity detects that you are using certain classes, it adds automatically the required permissions to make your application work. So, if you are calling any method of the class “Microphone”, for instance, Unity understands that you want to use the microphone in your app, and automatically adds the RECORD_AUDIO permission to the manifest. This usually is a very welcome behavior, and it avoids us a lot of nuisances (like calling directly the Android.Permissions methods) in all the most common cases. It can also lead to some false positive detections that most of times are not a problem, but in this case, it is actually creating a huge problem.
Do you remember when I said that in my Unity Cube app I added the hands of the user? Well, they are added via the Oculus Avatar SDK. Inside the Oculus Avatar SDK (technically the Oculus Platform SDK), there are some classes called MicrophoneInput, IMicrophone, LivestreamingMicrophoneStatus, and so on, that of course call the methods of the Microphone class. So, since I have included in my project the full Oculus Plugin, which includes the Oculus Platform, Unity finds in my project some files referencing the Microphone class and so automatically adds the audio permissions that are blocking the approval of my fantastic application.
Ok, so it’s time to instruct Unity not to do it anymore!
You can’t instruct Unity not to do it

Sorry to disappoint you. I have used all my programming knowledge (that is, I have searched on Stack Overflow), and I found that there is no explicit way of telling Unity to avoid adding these permissions to the Manifest.
But thanks to another search on Stac… ehm, to my abilities, I have found three ways through which you can anyway solve the problem.
Solution 1: The Law Of Retaliation
If you are a rough guy and you like brute force approaches, you will like this one. You simply delete all the files referencing the Microphone class, and/or you comment the lines that make the references.
The good of this approach is that it is simple and effective.
The bad is that if there are many references to the classes you are removing, you have to spend some time adjusting all the code, commenting all the references out. Plus, if you update the Oculus Plugin, all these modifications get canceled, and you have to re-do everything from scratch.
This is the best approach if you have few files that have the references to Microphone, and you are 100% sure that you are not going to need them in the future, nor that you are going to update the project.
Solution 2. Hackerman

After the build process, you can modify the AndroidManifest.xml file directly inside your APK. APKs are special packages, but you can unpack them using a tool called ApkTool. You can unpackage your APK, open its manifest file, remove the unwanted permissions, and then package it all again always with ApkTool. After that, you have to re-sign the APK (remember that App Lab requires signed applications!) and re-align it. You can have a look at this Reddit post to see more or less how this process works.
The good of this approach is that it is so nerdy that all the girls and the boys around you will fall in love by watching you do this.
The bad is that it is a very slow, manual, and dirty process, and performing it is a bit clunky. Not to mention that being a bit hacky, you never know if something weird is happening in this packing/unpacking process.
I would advise this approach only if you have lost your source code and you are looking for a desperate way of fixing your APK for the submission.
Solution 3. Double flip
You control manually the build process, and you let Unity only do automatically the first step of it. Then you manually modify the AndroidManifest.xml file and finalize the build.
The good of this approach is that it is clean and elegant
The bad is that it takes you a bit more time than a standard build
This is the approach that I liked the most, so I’ll explain it to you in detail.
The Double Flip Build Process
The first thing that you have to do is to not build your Unity project to an APK, but export it as an Android Studio project. When you build a Unity project, it under the hood creates an Android project and builds it with Gradle (the Android build tool), then it automatically gives you just the APK. Now we want it to give us this Android project, and we will launch the Gradle to build it manually ourselves. To do that, select File -> Build Settings… and in the options for the Android build, select “Export Project”. The Build button should change its label to “Export”. Click it, select a folder (I have called it “TheUnityCubeExport”) and let Unity do its things.

When the build has finished, you have a folder with your Android project. Launch Android Studio and open with it the Folder that has just been exported by Unity. Android Studio will unveil to you the Android project of your Unity game. If a popup asks you if you want to upgrade Gradle, tell Yes. In the upper-left corner of the project window, you should see a listbox with the item “Android” selected. Click on it, and select “Project”. There is a root element called with the same name of the project (in my case “TheUnityCubeExport”). Expand its tree, and go to the leaf TheUnityCubeExport\unityLibrary\src\main\AndroidManifest.xml.
Bingo! This is the AndroidManifest that Unity has created for us automatically, ready to be merged with the Oculus Store manifest that we created manually in Unity. Double click on the file to open it. You should see that it actually contains the damn permissions that are preventing us from being approved (they are the lines with <uses-permission> and the permissions about audio and Bluetooth, plus the <uses-feature> line about the Microphone). Just remove them (you can keep the one asking for Internet, if you want) and save the file.

Ok, now we are ready to build. But remember that it is a good practice to sign and align the APK before submitting it to the store. To align it, you can open the file TheUnityCubeExport\launcher\build.gradle and look for the “buildTypes” section. In the “release” subsection, add the command “zipAlignEnabled true”. So the section of that file in the end should look like this
buildTypes {
    debug {
        minifyEnabled false
        useProguard false
        proguardFiles getDefaultProguardFile('proguard-android.txt')
        signingConfig signingConfigs.debug
        jniDebuggable true
    }
    release {
        minifyEnabled false
        useProguard false
        proguardFiles getDefaultProguardFile('proguard-android.txt')
        signingConfig signingConfigs.debug
        zipAlignEnabled true
    }
}
Saving this file, a little toolbar over it should tell you that you should re-sync your project. Click on the “Sync Now” link in the upper right corner and wait for some seconds.
At this point, we can build our game: head to the menu Build -> Generate Signed Bundle / APK… Then select that you want to build an APK and hit Next. In the next window, you have to specify the path to your keystore, the password of the keystore, the key in the store and its password. The next window will ask you where to put your APK file, so choose the path that you prefer. As Build Variant select “Release” and then check both boxes for the Signature Versions. Hit Finish and the build process should start.
After the required time, the build process should have finished! If you didn’t specify the path for the final APK and you forgot where it is, you can click on the “Event Log” button in the lower-right corner of the window. There, the last message should provide you links to “Locate” and “Analyze” the APK. If you click on Locate, the system will open you a File Explorer window to the APK directory.

This APK is signed, aligned, and without unneeded permissions. It may have a name different than the one that you want (e.g. something like “launcher-release.apk”), but you can rename it very easily. You can check for the permissions with aapt again, and for the signature with apksigner (that is always in the build-tools directory), and it should be correct. To test if the application works, you can install the APK on your Quest with SideQuest and verify that it works as expected.

All is well what ends well! You now have an APK that is ready to be submitted on App Lab!
UPDATE 2021.04.08: My friend and VR developer Mr.Potam told me on Twitter that there could be a third, much easier method to remove these unwanted permissions. I haven’t tested it estensively myself yet, but I trust him when he says that it works. He says that what you have to do to remove the permissions you don’t want to appear, e.g. RECORD_AUDIO, is modifying your AndroidManifest.xml file inside Unity (in Assets\Plugins\Android) and add a line like this
<uses-permission android:name="android.permission.RECORD_AUDIO" tools:node="remove" />
for every permission you want to remove. And then define the “tools” at the beginning of the manifest:
<manifest xmlns:android="http://schemas.android.com/apk/res/android" android:installLocation="auto" xmlns:tools="http://schemas.android.com/tools" package="com.unity3d.player">
He says that you can do this for all the permissions that you want to remove. It is a very elegant solution, that doesn’t require any kind of 2-steps building or similar things! Try it and let me know if it works!
One last thing…
Before doing all this process, don’t forget to increment your application’s build number. You can find it in Unity under Edit -> Project Settings… ->Player Settings -> Other Settings -> Bundle Version Code. Every build you submit to App Lab should have a unique Bundle Version Code. So if the first version that was rejected had code 1, put code 2 here, and then perform all the build process described above. If you forget this, you risk having to re-do all the process again just to change this number!
I hope this tutorial will be useful for all the people that are having the same problem with their submission to Oculus App Lab! If it has been useful for you, don’t you mind making a small donation on Patreon or at least subscribing to my newsletter?
Disclaimer: this blog contains advertisement and affiliate links to sustain itself. If you click on an affiliate link, I'll be very happy because I'll earn a small commission on your purchase. You can find my boring full disclosure here.


