Meta AI Agentic Workflow for WebXR development: how to get started and hands-on impressions
A couple of weeks ago, Meta announced a fully integrated agentic workflow for its Immersive Web SDK, claiming it lets creators vibe-code WebXR prototypes by just writing prompts. But does it work as advertised? Read my hands-on impressions to discover it!
[Disclaimer: At a certain point in the post, I mention my Dell computer setup because I’m a Dell Pro Precision Ambassador, and I have been given a Dell PC to make cool tests like this one]
Meta Immersive Web SDK
Before getting into my hands-on impressions, let’s take a step back and explain what we are talking about.
The Immersive Web SDK (IWSDK) is a framework that Meta released at the latest Meta Connect, and it is aimed at facilitating the development of WebXR experiences.
We all know the potentialities of WebXR: it is very useful to create XR experiences that can work on all devices and that can be shared by just sending a link. The problem is that creating WebXR experiences is still very clunky: you don’t have tools like Unity, but you often have to resort to low-level libraries like Three.js. Developing for it seems like returning to the ’90s and developing 3D experiences using OpenGL. It’s no surprise that there are not many pieces of content for it: it’s very hard and cumbersome.
Luckily, in the last few years, there have been some initiatives trying to fix this problem. One, for instance, is the Wonderland Engine, which tries to offer a sort of Unity for WebXR. And another one is Meta, with its suite of the Immersive Web SDK.

IWSDK is built on top of three.js, but offers a high-level interface to developers, with ready-to-use functions for grabbing objects, locomotion, spatial audio, and all the other basic features that we developers are expecting when creating a VR experience. Furthermore, it uses the Entity Component System, which makes it more modular.
One of the greatest innovations of this solution is that Meta is also offering a visual development tool, a sort of Unity of WebXR, called the Meta Spatial Editor, which lets you visually create your WebXR experiences by actually importing 3D assets and moving them in the scene using visual handles.
Agentic workflow for IWSDK
Given the recent attention of us developers towards AI-assisted development tools like Claude Code, Cursor, or GitHub Copilot, and given Meta’s big investments in AI, the company has decided to release a solution to let you create your WebXR experiences with the help of AI.
You may wonder what this actually means: the AI tools for development can already work well with TypeScript, which is the default language of the IWSDK. Well, that’s true, but Meta managed to create a workflow for the AI agents to properly work with Immersive WebSDK projects.

This mainly means a couple of things. The first is that when a project is created for IWSDK using the default template, it already contains all the required instruction files for the AI agents to understand how to properly build with IWSDK. Since I use GitHub Copilot, it means, for instance, having a very long copilot-instructions.md file ready out of the box that gives a context to AI agents, explaining to them the structure of the project, how to properly create the various components, the common mistakes to avoid, and so on. This makes a huge difference, because IWSDK is a rather new and niche SDK, so for sure the AI tools that we devs use have not been trained much to use it. So, having all these explanations makes the output of AI agents operating on the project much better.
The second is that there are a lot of MCP tools that the AI agents can use. If you don’t know what “MCP tools” means, let me explain it very briefly to you: it basically means that the AI agents are provided with a specific toolkit they can use when they see the need… they don’t know how these tools work, but they know that if they need to do a certain thing, there is a tool that can do it for them. Meta has implemented many tools related to XR development and testing. And this is, in my opinion, a great thing that I think we’ll see more and more in XR development.
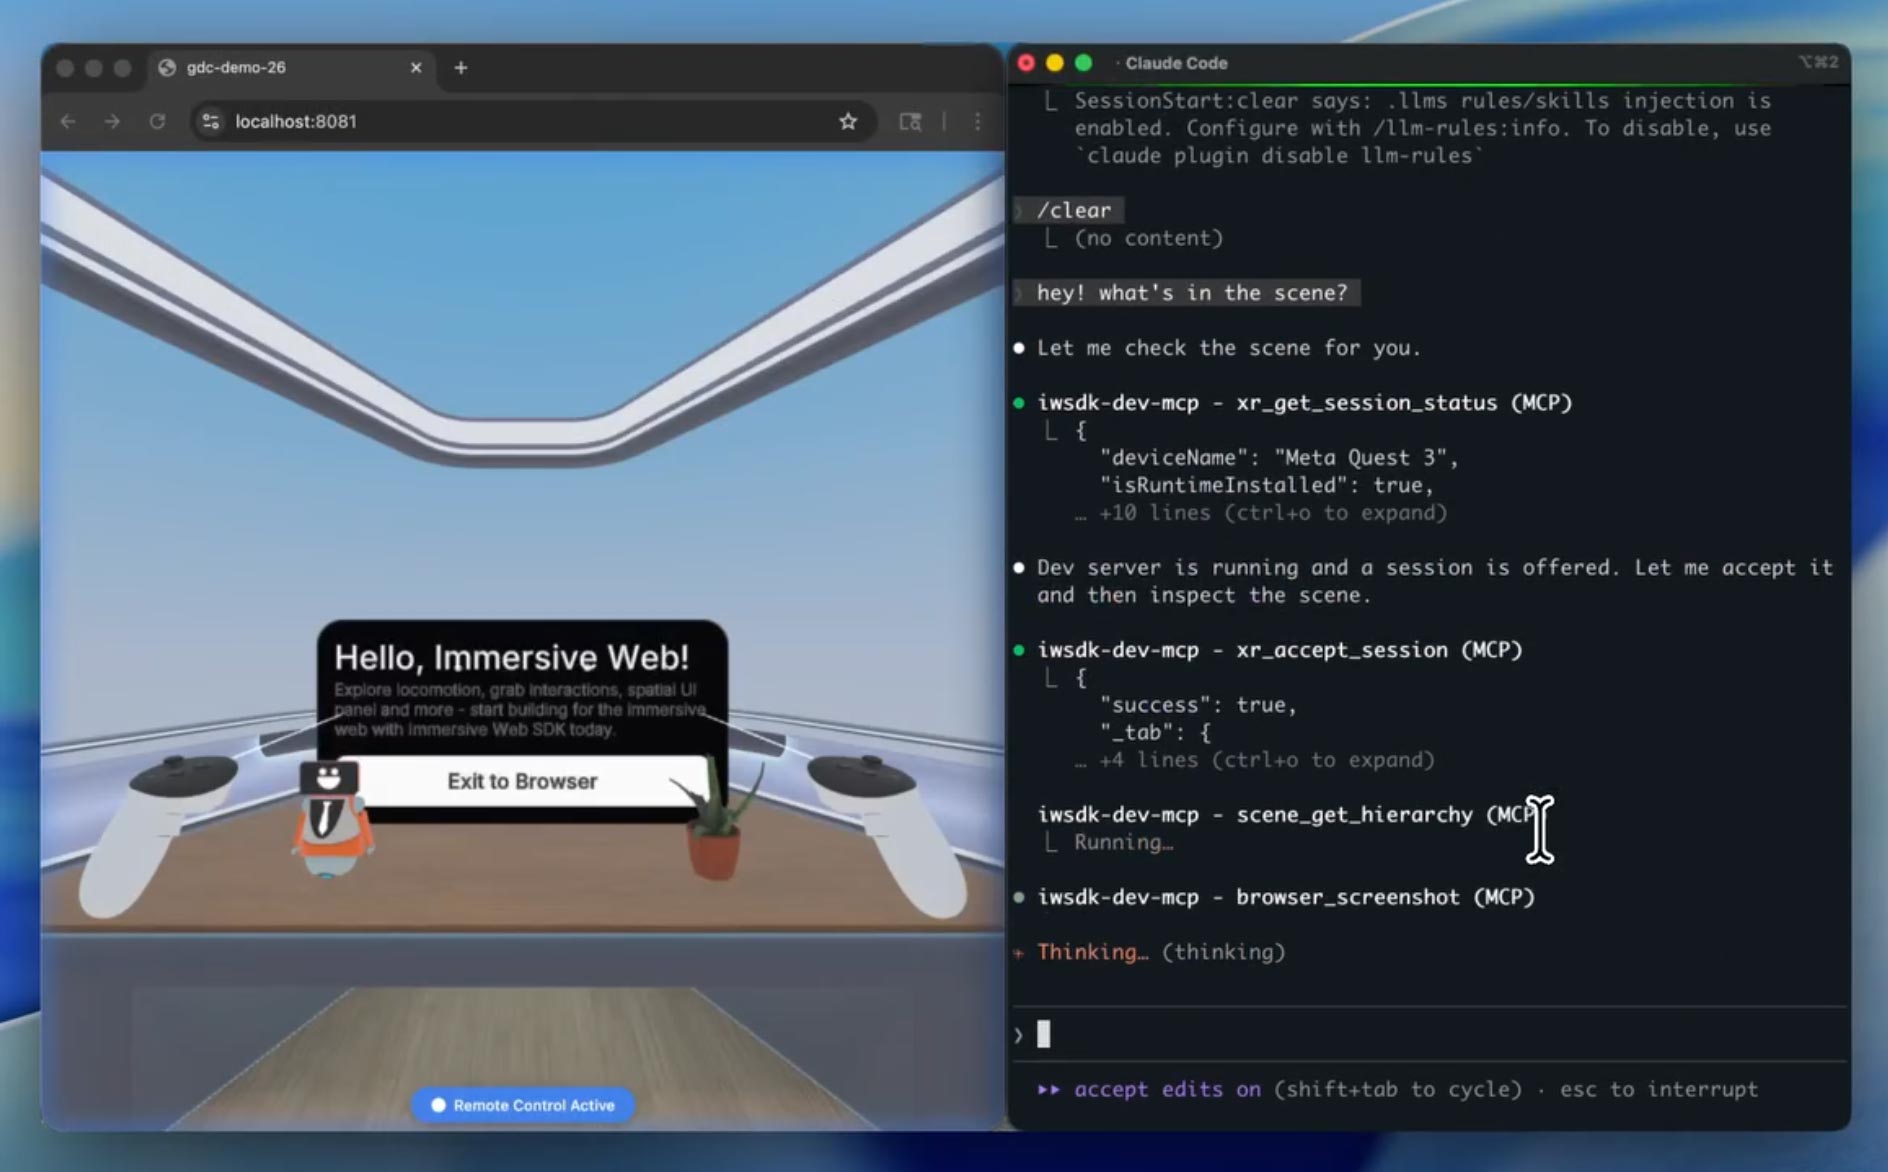
The tools that are provided to AI agents are things like “take a screenshot”, “move to that position”, “move the controller to that position”, and “press that controller button”. This means that the AI agents can, after having developed a certain feature, test it by invoking the tools and verifying that the solution is working as expected, and if not, fix it. The agents can do that because when you operate with the IWSDK, they have a dedicated instance of the browser running the WebXR experiences you are developing. And they can interact with the experience via the tools and the Playwright APIs.
So let’s make an example to see why this is super cool. Imagine that you’re asking the system to put some cubes in the scene so that they create a smiley face. The AI agents may insert the cubes in the scene, then run the experience in the browser, take a screenshot, analyze the image, notice that they don’t represent a smiley, think about how to change the cubes, change them, re-take a screenshot, and so on until everything works. They did all the development and testing by themselves, without requiring you to support them. Or you can ask to make a sphere that can be grabbed and thrown. The agents may write the code, then run the experience in the browser, move the controller, and operate it so as to grab the sphere, then keep moving the virtual controller and verifying by querying the entity system that the position of the sphere changes together with the position of the controller. If yes, then good, otherwise the agent automatically starts analyzing the code to see why it does not work.
I love this because currently, we devs do not have many tools that automatically perform tests in XR. Testing that a web API call works is easy; testing that an object is grabbable usually requires putting on a headset and manually testing it. In this case, the system can automatically do the tests in XR. Even better, the AI agents can automatically do the tests and improve the code, so you avoid the loops typical of vibecoding, that is, you write prompts, then manually test the experience, see what is not working, tell the AI what to fix, making the AI try again, then you test again, etc… In this case, the loop is executed automatically. So, theoretically, you can just write a prompt, leave the AI do its job for various minutes of trial-and-error, and then come back again when everything is magically working. Or at least, this is what is claimed.
Now, let’s see how to get started with this tool and what my results have been with it.
How to get started with the Agentic Workflow of IWSDK
Meta already provides very extensive documentation for both the Immersive Web SDK and its agentic workflow, so here I will just give you a very high-level overview on how to get started.
This is what you should do, following the instructions on this page:
- Install Node.js (you can find it here)
- Import the template project for IWSDK and AI: go to the root folder where you want your WebXR projects to be created, open a console window, and type npm create @iwsdk@latest
- At this point, a textual interface will ask you
- The name of the project (the whole project will be put in a subfolder with this name)
- What AI coding tool you use (the most famous tools like Claude Code or GitHub Copilot are listed). This will let the system integrate all the documentation files needed for your favorite AI tool to understand IWSDK, as explained above
- If you prefer TypeScript or JavaScript (I hate both, but hey, I still had to choose one)
- If you want to build an AR-passthrough or a VR experience (it is cool, you can do both)
- What features you want in the project: do you want hand tracking? Do you want physics?
- … and so on
After you have answered all these questions, a template project is created for you, ready to be used for WebXR development with AI agents! The template already contains a basic scene with a small room with a desk to get you started.

At this point, you can open the project as you prefer. I usually develop using VS Code with GitHub Copilot, so I opened it with Visual Studio Code. After I opened the project with VS Code, I opened a console terminal inside it and typed npm run dev. This line basically starts the Vite development server, which is a little server that lets you preview web pages locally during development without having to deploy them every time. IWSDK opens an instance of your browser and launches the experience inside it to give you a live preview of what you are building.
At this point, the fun can start!
AI-assisted development
Once everything is set up, you can start using the AI agentic workflow. For me, this means opening a Copilot chat session and starting to write what I want, like, for instance, “add a yellow cube on the desk and make it grabbable and throwable”.
The AI agents are able to do their job thanks to the support of the instructions in the various preset instruction files and using the tools. If you follow the chat of the agents, you can see, for instance, that they will shoot various screenshots and invoke various tools to check if things are going as expected.
If you edit the file vite.config.ts, you can also use the Oversight mode (check the various available modes here) to show the hidden Playwright browser and see with your eyes how the agents are testing the experience. Agents, in fact, don’t use your browser, but have a dedicated instance for their tests. It’s very cool to see: sometimes you can spot, for instance, a controller that is moved automatically in this browser window because the agent is checking if the interactions are working as expected. It feels very futuristic.

In general, the workflow is as follows:
- You write prompts in the chat about what you want and let the agents do their stuff. You can grab a coffee in the meantime.
- When the agents have done their stuff, you can test it in the browser (we’ll see how later)
- You see what you like and what you don’t like, and then you can ask the AI for modifications to the current features or implement new ones.
- You have your WebXR experience!
Once you get used to the workflow, you can, of course, start to improve it by writing your own skills and improving the base instructions given to agents. This is especially advised if you use AI models that are not working well out of the box with the system.
Importing assets
If you need specific assets for your project, you can import them easily. 3D models (in GLB/GLTF format), images, HDR images, and audio files are all supported.
You can either import them by yourself (following this doc) or you can ask your AI agent to import them for you. In any case, it is a pretty simple process.
Running the experience
There are three ways to run the experience you’re creating, to test it. The two that you use during development are:
- On your PC, a browser window is opened (usually on localhost:8081), connected to the Vite server to let you do quick tests. This browser window runs a VR emulator and lets you move your character and controllers using the mouse and keyboard. Interacting with the mouse and keyboard is a bit clunky, but it does the job for quick tests.
- You can also connect to the Vite server from either your local machine or even on an external device connected to an XR headset and running a WebXR browser, to try the experience in VR. This means that you can, for instance, wear your Quest, open the Meta Browser, type the local address of your PC, and see the web page loaded, ready for you to try. For instance, today the local address of my development PC is 192.168.1.4, so with the Quest connected to the same local Wi-Fi, if I type https://192.168.1.4:8081 in the address bar of the browser, I can try the experience I’m developing in virtual reality on the fly.

Notice that for the above solutions to work, you need to have the Vite server running, so you need to have a session of “npm run dev” still running. If, for instance, you had launched this session inside VS Code and then you closed VS Code, you can not try the experience anymore.
The other approach is the one you use to actually deliver the experience. The Vite server is only good as a quick way to test the experience, but to deliver it, you need to build it. Meta has a dedicated section of the documentation to teach how to build the experience, but basically, it all starts with npm run build. Again, the IWSDK has been made to just do everything by itself, by giving you results with just one quick command. The system will provide you with a folder with your application built in an optimized way. At this point, you have to upload this folder to a web server able to handle it, or alternatively, on a service like GitHub Pages. Once you have uploaded it, you can take the link to the index.html file inside the folder, and either test it by yourself in some WebXR browser or share the link with others so that they can enjoy it.
Hands-on impressions
Until now, it all seems great. But… is it as advertised? Well, yes, and no.
The system kinda works, but on some things it works better than others. For instance, some things that worked very well on my tests were:
- Making things grabbable and throwable
- Importing assets
- Detecting collision between elements
- Counting score increments on some conditions
Other things behaved definitely worse:
- Physics understanding has always been weird. My first test was adding a cube to a desk. The AI did it, and the gravity made the cube fall into oblivion. I so asked the AI to fix the colliders, and it started a very long loop of reasoning full of screenshots, to then… fix nothing. It took me a lot of iterations to fix this.
- Object positioning: I know that it is complicated, using only prompts, to say “put this cube on the right of the plant” and make the AI understand exactly where you want the object to be. But most of the time, it just puts the objects in the weirdest position possible. For instance, I asked it to import a Cesium man and scale it so that it fits under the desk. The first result was a man with the head coming out from the desk, and the second a man with the head coming out of the FLOOR. What the hell.

Talking about the tools and their management by the AI, this has not been ideal either. For everything I asked, it usually started a very long reasoning loop, with a lot of calls to various tools. Usually, I ask AI agents to ask for my approval for every tool call, but in this case, there were literally too many, so I had to go for the Autopilot auto-approval feature (hoping that the AI didn’t go rogue and try to delete my hard drive). Everything I asked usually went on for minutes with lots of tool invocation and lots of reasoning. And it is not even guaranteed that the result of all these operations is correct. On the contrary, it may spectacularly fail, especially if you ask one of those things about which the system has issues, like the colliders mentioned above. It took me like 30 minutes to have a grabbable yellow cube sitting on the desk. The cube was made in a few minutes, but fixing its collision and physics took ages. Not the best performance for something I could manually do myself in Unity in like 1 minute.
It also happened to me once that an infinite loop started, and I had to manually block it. In general, it seems a workflow that can make you spend a lot of your tokens. Maybe it’s an inside job by Anthropic to force you to ramp up your Claude Code subscription lol.
The resulting code is ok-ish, but not amazing. It really feels vibecoded. Without giving it exact instructions on how to write good code, it came out without comments and without a good modular structure. It was not that bad, but it didn’t look like production code to me.
As for the agent browser to watch the work it is doing, it is quite underwhelming, too: I expected to see a sort of bot moving the controllers or moving around, while most of the time, you just see an abrupt camera movement, and that’s it. It is not always clear what tests it is doing by looking at the Playwright browser. Most of the time, if it correctly invokes the tools, it does good tests, but it is hard to inspect them.
The importance of the AI model
As with every AI-assisted workflow, I also noticed that the AI model that you’re using has a lot to do with the results you may obtain.
When I used advanced models like Claude Sonnet 4.6 or GPT-5.3-Codex, the results were pretty ok. Very long chats, lots of calls to tools, but then the result was decent. I still needed to ask for many fixes, but the workflow was kinda ok. But when I tried smaller models, performance degraded a lot.
Using my powerful Dell Pro Max Tower T2 with its NVIDIA RTX 6000 Blackwell graphics card, I connected GitHub Copilot with some local LLMs, like the recent Gemma 4 released by Google, using llama.cpp as the local server (I’ll write a small article soon about how I connected Copilot to my local LLMs). The results were definitely worse:
- The system spent endless time inside the chats during the reasoning
- It used far fewer of the tools that were available to it, often resorting to guessing (I mean, guessing wrong)
- The results were much more imprecise

This was to be expected, considering that smaller models usually perform much worse in coding tasks than the big ones. Here, anyway, the difference in performance was much more than the usual: considering these small LLMs have never seen this SDK and have less “imagination” power than the frontier models, the system often went fully haywire. It was good that I was still able to obtain some good results, but the time required to obtain them, and especially the manual trial-and-error iterations, was very high. Not to mention the fact that my GPU caught on fire, and the temperature of my room rose so much that my feet basically became like roast chicken.
My suggestion with this AI workflow is to stick with frontier models if you have enough tokens to use them. If you have to resort to a smaller model, you had better invest some time to write the various skill files, and also keep reminding the agents in the prompts to use the tools and the right workflow.
Early results
I had a couple of long sessions with this framework, and I agree with my friend Dilmer Valecillos that the more I kept using the tool, the better I got at using it.
In my first session, in two hours of work, I managed to create this small demo about grabbable cubes that emit a particle when touching the floor, and red spheres with which I can play a sort of basketball.
The result is nice, very ok for a prototype, and it is nice that I was able to write everything by just vibe-coding it, without ever touching the code myself. But I needed almost 2 hours to make it, which is an insane time for the complexity of the experience.
In another session, I tried to use only the local Gemma 4 LLM to create a cute dandelion. And I actually did it! But it required me like 4 hours (I’m not even kidding) because the LLM kept having problems fixing the bugs and understanding how to use the tools. Probably I’ll have to sell one of my kidneys to pay the electricity bill at the end of the month.
Final impressions
I think the agentic workflow for the Meta Immersive Web SDK is a very nice thing, but it is also quite in the early stages. The idea is great, and the fact that it introduces not only automatic development but also automatic testing is a game-changer. And, amazingly, it’s related to WebXR, something for which we need better development tools.
But things do not work as advertised, yet. AI makes very long loops, still produces errors, and sometimes it gets stuck on some tasks. It’s good that you can already obtain some results, but this still feels unsuitable for production work. It seems to me good to make small prototypes or to use it to assist yourself when you’re already using the IWSDK in your workflow, and you need a boost to help with your work.
Anyway, I think it’s a nice initiative, and I compliment the team working on it. I will keep an eye on it to see how it will evolve in the future! It will be great to have a tool to help people easily develop WebXR experiences!
(And you, if you liked this post, please share it with your peers and also make a donation on my Patreon to help me pay for the electricity of these AI+XR experiments!)
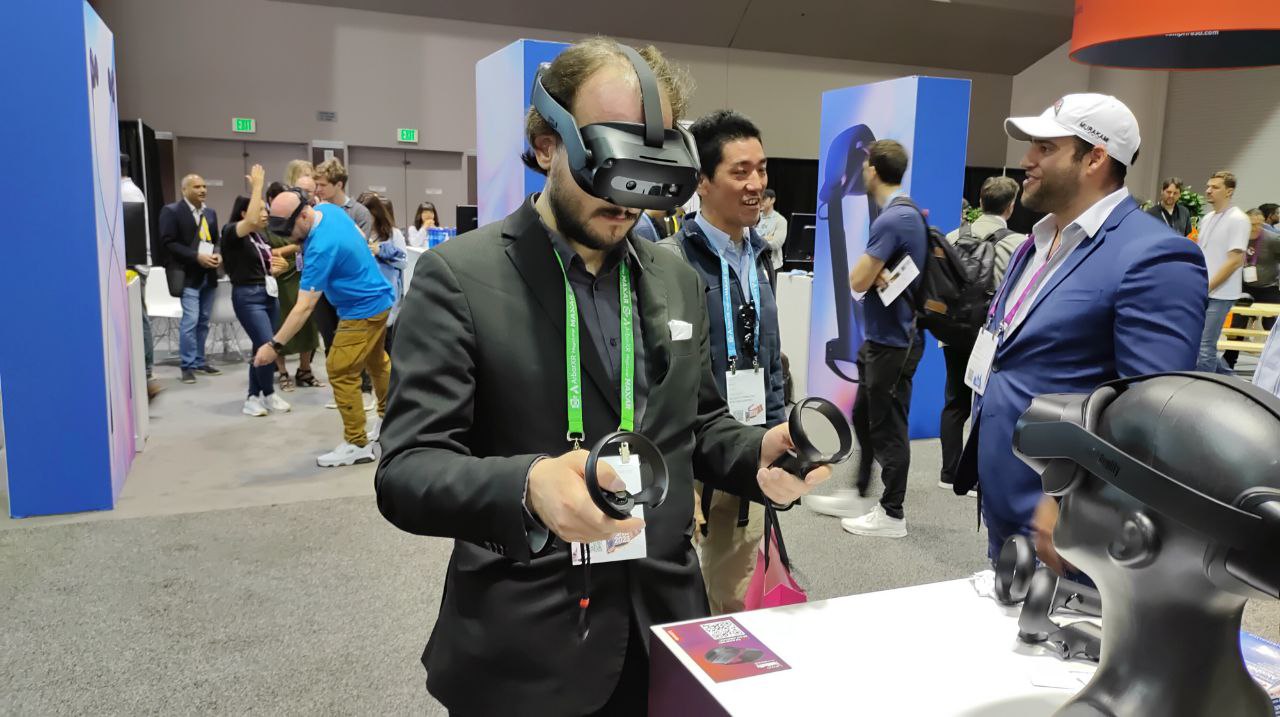
(Header image by Meta)
Disclaimer: this blog contains advertisement and affiliate links to sustain itself. If you click on an affiliate link, I'll be very happy because I'll earn a small commission on your purchase. You can find my boring full disclosure here.